How I Created My Budget-Friendly Content Setup at Home
- Erika Hernandez
- Feb 3
- 4 min read

Some of the links in this article are affiliate links, which means I may earn a small commission if you make a purchase through them—at no additional cost to you. I only recommend products I truly love. Thank you for supporting my blog!
We’ve all been there—starting a new goal, getting excited, and thinking, this is the year I’ll finally be consistent with my content. But life, of course, has its own plans, and consistency becomes harder to maintain. For me, 2025 is all about being intentional with my content creation. I’ve decided to take my journey more seriously by sharing my experiences in hopes that it resonates with someone else going through similar situations. The ultimate dream is to eventually turn this passion into a side hustle that helps pay off debt and save up for my big move when the time comes. It’s a slow and steady process, but I’m here for it.
Even though I took a break from social media, content creation never stopped. I focused on refreshing my website and, in the process, wrote 23 blog articles and filmed a handful of videos that stayed safely tucked away in my drafts. It wasn’t until I decided to return to social media that I realized the content I was sitting on was more than enough to share. But the next big challenge became figuring out how to film in my home without it feeling like a snooze fest.
When I started recording videos in front of blank walls, the footage felt... lifeless. I knew I needed something—anything—to create depth and make my space feel more inviting. But with the ongoing packing and decluttering around my place, things were far from aesthetically pleasing. So, I went on a mini treasure hunt around my apartment, pulling together what I could find to create a backdrop that didn’t feel so flat.
Finding the Perfect Filming Spot
After trying to figure out the best corner to film in, I settled on a small but mighty space in my living room. It's just 4 feet wide, but it happens to be the only spot in my apartment that gets the most natural sunlight during the day—an absolute game-changer when filming.
This space also gave me the depth I was after. It provided enough room for my equipment, and I could film full-body shots without having to worry about cutting off my head or feet.
But, let’s be real, the space was still bare. The walls were just, well, walls. So, it was back to rummaging through my apartment to find anything that could work as part of my backdrop. First up? A large piece of wall art I had hanging in my bedroom. It was 24x36 inches and just the right size to serve as the centerpiece of my backdrop. It had enough weight and presence to avoid looking like an empty, flat wall.
Then, I decided to make my living room media console part of the backdrop too. I had a table lamp that was just sitting in the corner of the room, but when I slid the console over, I realized I could frame it into the video and use it as some nice ambient light. Adding a little extra glow? Yes, please. Lastly, I moved a faux plant I had been considering purging to the opposite side of the media console. It wasn’t the most glamorous piece of decor, but it definitely added some life to the scene. Not perfect, but good enough!
The Chair Dilemma
Here’s the thing: unless I’m filming an outfit of the day (OOTD), I prefer sitting down when filming. But guess what? I didn’t have a comfy chair that would work in my filming setup. (Story of my life, right?) I used to own a crisscross desk chair that would’ve been ideal, but I sold it a few months ago. The only chairs I had left were my hard-as-rock dining chairs and my super-comfy but not-at-all-filming-friendly desk chair. So, I did what any reasonable person would do during Cyber Monday sales—I bought a mid-century accent chair.

Now—this wasn’t the most responsible purchase. When I finally move, it won't fit my future “grandmillennial” style (don't even ask), but i needed a chair and this one was great for the price.
My Equipment: Keeping It Simple
Now, let's talk gear. I'm all about simplicity and making the most of what I have, so I keep things pretty straightforward with my equipment. All I use are my iPhones—yes, both of them. One is used to film straight-on, while the other is placed off to the side for different angles or close-ups. I also have two NEEWER 2 Bi Color 660 LED Video Lights. I mostly use these when it’s cloudy or if I’m filming at night, but on bright sunny days, I’ll turn them off and rely on natural light.
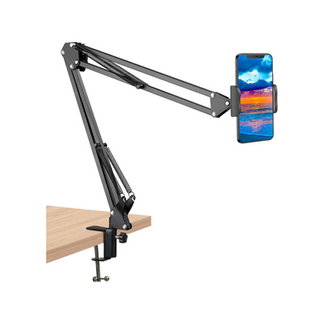
Other than that, I’ve got a tripod with a phone mount, a Gooseneck Phone Holder for additional angles, and a Lavalier Lapel Microphone to ensure clear audio. For those impromptu lighting needs, I use the ULANZI VL49 2000mAh LED Video Light with 3 Cold Shoes. It’s small, but it does the job when I need it.
For a little extra insurance, I use a floor mirror to make sure I’m in the frame with my back camera. I prop it up against the back of my dining room table and use it to check that I’m positioned just right in the shot. It’s a bit of a DIY trick, but it works wonders!
The Bottom Line
Content creation doesn’t have to be complicated or expensive. If you’re working with a tight budget or limited space, you can still create great videos. It’s all about being resourceful and making use of what you have on hand. I’ve learned that sometimes, the most effective setups come from being creative with your space and equipment. My goal for 2025 is to keep building and improving on this setup, and I can’t wait to see where this journey takes me.
If I can do it, so can you!


Komentar